# 阿里巴巴高效的离线数据同步工具DataX
# 前言
我们公司有个项目的数据量高达五千万,但是因为报表那块数据不太准确,业务库和报表库又是跨库操作,所以并不能使用 SQL 来进行同步。当时的打算是通过 mysqldump 或者存储的方式来进行同步,但是尝试后发现这些方案都不切实际:
# mysqldump方案
不仅备份需要时间,同步也需要时间,而且在备份的过程,可能还会有数据产出(也就是说同步等于没同步)存储方式:这个效率太慢了,要是数据量少还好,我们使用这个方式的时候,三个小时才同步两千条数据…
# 实际生成环境需求
1.将某里云的MySQL5.7数据库A(RDS数据库)全量同步到某讯云MySQL5.7数据库A
2.后台实时增量备份
某里云现有产品:DTS(收费产品)
# 开源地址
https://github.com/alibaba/DataX
# DataX是什么

DataX是阿里云DataWorks (opens new window)数据集成的开源版本。
DataX 是阿里云 DataWorks 数据集成 的开源版本,主要就是用于实现数据间的离线同步。 DataX 致力于实现包括关系型数据库(MySQL、Oracle 等)、HDFS、Hive、ODPS、HBase、FTP 等 各种异构数据源(即不同的数据库) 间稳定高效的数据同步功能。

为了 解决异构数据源同步问题,DataX 将复杂的网状同步链路变成了星型数据链路 ,DataX 作为中间传输载体负责连接各种数据源; 当需要接入一个新的数据源时,只需要将此数据源对接到 DataX,便能跟已有的数据源作为无缝数据同步。
# 设计理念
为了解决异构数据源同步问题,DataX将复杂的网状的同步链路变成了星型数据链路,DataX作为中间传输载体负责连接各种数据源。当需要接入一个新的数据源的时候,只需要将此数据源对接到DataX,便能跟已有的数据源做到无缝数据同步。
# 当前使用现状
DataX在阿里巴巴集团内被广泛使用,承担了所有大数据的离线同步业务,并已持续稳定运行了6年之久。目前每天完成同步8w多道作业,每日传输数据量超过300TB。
此前已经开源DataX1.0版本,此次介绍为阿里巴巴开源全新版本DataX3.0,有了更多更强大的功能和更好的使用体验。
# datax基本组件介绍
DataX本身作为离线数据同步框架,采用Framework + plugin架构构建。将数据源读取和写入抽象成为Reader/Writer插件,纳入到整个同步框架中。
Reader:Reader为数据采集模块,负责采集数据源的数据,将数据发送给Framework。
Writer: Writer为数据写入模块,负责不断向Framework取数据,并将数据写入到目的端。
Framework:Framework用于连接reader和writer,作为两者的数据传输通道,并处理缓冲,流控,并发,数据转换等核心技术问题。

# datax主流数据库支持情况
DataX目前已经有了比较全面的插件体系,主流的RDBMS数据库、NOSQL、大数据计算系统都已经接入,目前支持数据如下图,
详情请点击:DataX数据源参考指南 (opens new window)
# 系统要求
测试系统: Centos7
内网IP: 192.168.1.3 【node03,安装Datax】
内网IP: 192.168.1.4 【node04,安装MySQL5.7】
需求: 通过Datax工具将阿里云的RDS(mysql5.7)的数据库同步到本地node04服务器中。
jdk1.8+
python运行环境(推荐python2.6.x)
# Datax 安装
# 1.下载安装并解压
node03服务器执行以下命令进行解压
# wget http://datax-opensource.oss-cn-hangzhou.aliyuncs.com/datax.tar.gz

备用下载: http://js.funet8.com/centos_software/datax.tar.gz

# mkdir /data/
# tar -zxf datax.tar.gz -C /data/
2
3
4
5
6
文件信息:
文件名称:datax.tar.gz
文件大小:853734462 字节
MD5     :8E93697ADDBD26BEBC157613089A1173
SHA1    :B0735462809F664D721D992DF5FD4813C0DB360C
CRC32   :FA2708CC
2
3
4
5
# 2.验证datax是否安装成功
进入datax的安装目录的bin路径下,然后执行以下命令验证datax是否安装成功
node03执行以下命令进入datax的bin目录
# cd /data/datax/bin
# python datax.py -r streamreader -w streamwriter
2
出现以下结果,证明安装成功
[root@node3 bin]# python datax.py -r streamreader -w streamwriter

DataX (DATAX-OPENSOURCE-3.0), From Alibaba !
Copyright (C) 2010-2017, Alibaba Group. All Rights Reserved.


Please refer to the streamreader document:
     https://github.com/alibaba/DataX/blob/master/streamreader/doc/streamreader.md

Please refer to the streamwriter document:
     https://github.com/alibaba/DataX/blob/master/streamwriter/doc/streamwriter.md

Please save the following configuration as a json file and  use
     python {DATAX_HOME}/bin/datax.py {JSON_FILE_NAME}.json
to run the job.

{
    "job": {
        "content": [
            {
                "reader": {
                    "name": "streamreader",
                    "parameter": {
                        "column": [],
                        "sliceRecordCount": ""
                    }
                },
                "writer": {
                    "name": "streamwriter",
                    "parameter": {
                        "encoding": "",
                        "print": true
                    }
                }
            }
        ],
        "setting": {
            "speed": {
                "channel": ""
            }
        }
    }
}
2
3
4
5
6
7
8
9
10
11
12
13
14
15
16
17
18
19
20
21
22
23
24
25
26
27
28
29
30
31
32
33
34
35
36
37
38
39
40
41
42
43
需要删除文件
# rm -rf /data/datax/plugin/*/._* # 需要删除隐藏文件 (重要)
当未删除时,可能会输出:[datax/plugin/reader/._drdsreader/plugin.json] 不存在. 请检查您的配置文件.
# Datax实战
# 一、使用datax实现stream2stream数据读取
使用datax实现读取字符串,然后打印到控制台当中来
# 1)第一步:查看帮助文档
# cd /data/datax
# python bin/datax.py -w streamwriter -r streamreader

DataX (DATAX-OPENSOURCE-3.0), From Alibaba !
Copyright (C) 2010-2017, Alibaba Group. All Rights Reserved.


Please refer to the streamreader document:
     https://github.com/alibaba/DataX/blob/master/streamreader/doc/streamreader.md

Please refer to the streamwriter document:
     https://github.com/alibaba/DataX/blob/master/streamwriter/doc/streamwriter.md

Please save the following configuration as a json file and  use
     python {DATAX_HOME}/bin/datax.py {JSON_FILE_NAME}.json
to run the job.

{
    "job": {
        "content": [
            {
                "reader": {
                    "name": "streamreader",
                    "parameter": {
                        "column": [],
                        "sliceRecordCount": ""
                    }
                },
                "writer": {
                    "name": "streamwriter",
                    "parameter": {
                        "encoding": "",
                        "print": true
                    }
                }
            }
        ],
        "setting": {
            "speed": {
                "channel": ""
            }
        }
    }
}
2
3
4
5
6
7
8
9
10
11
12
13
14
15
16
17
18
19
20
21
22
23
24
25
26
27
28
29
30
31
32
33
34
35
36
37
38
39
40
41
42
43
44
# 2)第二步:开发datax配置文件
node03服务器开发stream2stream的配置文件
# cd /data/datax/job
# vim stream2stream.json
{
    "job": {
        "setting": {
            "speed": {
                "byte":10485760
            },
            "errorLimit": {
                "record": 0,
                "percentage": 0.02
            }
        },
        "content": [
            {
                "reader": {
                    "name": "streamreader",
                    "parameter": {
                        "column" : [
                            {
                                "value": "DataX",
                                "type": "string"
                            },
                            {
                                "value": 19890604,
                                "type": "long"
                            },
                            {
                                "value": "1989-06-04 00:00:00",
                                "type": "date"
                            },
                            {
                                "value": true,
                                "type": "bool"
                            },
                            {
                                "value": "test",
                                "type": "bytes"
                            }
                        ],
                        "sliceRecordCount": 10
                    }
                },
                "writer": {
                    "name": "streamwriter",
                    "parameter": {
                        "print": true,
                        "encoding": "UTF-8"
                    }
                }
            }
        ]
    }
}
2
3
4
5
6
7
8
9
10
11
12
13
14
15
16
17
18
19
20
21
22
23
24
25
26
27
28
29
30
31
32
33
34
35
36
37
38
39
40
41
42
43
44
45
46
47
48
49
50
51
52
53
54
# 3)第三步:启动datax实现数据的打印
执行以下命令启动datax
# cd /data/datax
# python /data/datax/bin/datax.py /data/datax/job/stream2stream.json

2023-02-27 10:20:04.678 [main] WARN  ConfigParser - 插件[streamreader,streamwriter]加载失败,1s后重试... Exception:Code:[Common-00], Describe:[您提供的配置文件存在错误信息,请检查您的作业配置 .] - 配置信息错误,您提供的配置文件[/home/data/datax/plugin/reader/._drdsreader/plugin.json]不存在. 请检查您的配置文件.
2023-02-27 10:20:05.686 [main] ERROR Engine -

经DataX智能分析,该任务最可能的错误原因是:
com.alibaba.datax.common.exception.DataXException: Code:[Common-00], Describe:[您提供的配置文件存在错误信息,请检查您的作业配置 .] - 配置信息错误,您提供的配置文件[/home/data/datax/plugin/reader/._drdsreader/plugin.json]不存在. 请检查您的配置文件.
        at com.alibaba.datax.common.exception.DataXException.asDataXException(DataXException.java:26)
        at com.alibaba.datax.common.util.Configuration.from(Configuration.java:95)
        at com.alibaba.datax.core.util.ConfigParser.parseOnePluginConfig(ConfigParser.java:153)
        at com.alibaba.datax.core.util.ConfigParser.parsePluginConfig(ConfigParser.java:125)
        at com.alibaba.datax.core.util.ConfigParser.parse(ConfigParser.java:63)
        at com.alibaba.datax.core.Engine.entry(Engine.java:137)
        at com.alibaba.datax.core.Engine.main(Engine.java:204)
2
3
4
5
6
7
8
9
10
11
12
13
14
15
16
# 解决报错
部署datax到本地后首次执行任务报错
分别进入到 reader和 writer 目录,删除掉这类型文件
cd /data/datax/plugin/reader
rm -rf  ./._*

cd /data/datax/plugin/writer
rm -rf  ./._*
2
3
4
5
再次执行
# python /data/datax/bin/datax.py /data/datax/job/stream2stream.json

# 案例二:使用datax实现mysql2stream
使用datax实现将mysql一张表的指定字段的数据抽取出来,并打印出来
# 1)第一步:创建mysql数据库以及向mysql当中插入数据
执行以下命令创建mysql表数据
在 192.168.1.6 数据库中操作
# mysql -u root -h 192.168.1.6 -P 3306 -p'123456'
mysql> CREATE DATABASE `userdb`;
mysql> USE `userdb`;
mysql> DROP TABLE IF EXISTS `emp`;
mysql> CREATE TABLE `emp` (
`id` int(11) DEFAULT NULL,
`name` varchar(100) DEFAULT NULL,
`deg` varchar(100) DEFAULT NULL,
`salary` int(11) DEFAULT NULL,
`dept` varchar(10) DEFAULT NULL,
`create_time` timestamp NOT NULL DEFAULT CURRENT_TIMESTAMP,
`update_time` timestamp NOT NULL DEFAULT CURRENT_TIMESTAMP ON UPDATE CURRENT_TIMESTAMP,
`is_delete` bigint(20) DEFAULT '1'
) ENGINE=InnoDB DEFAULT CHARSET=latin1;
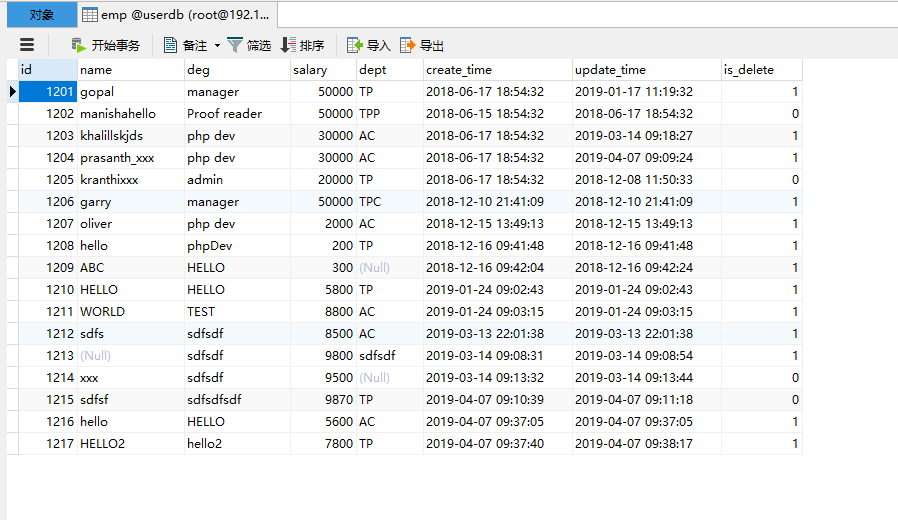
mysql> insert into `emp`(`id`,`name`,`deg`,`salary`,`dept`,`create_time`,`update_time`,`is_delete`) values (1201,'gopal','manager',50000,'TP','2018-06-17 18:54:32','2019-01-17 11:19:32',1),(1202,'manishahello','Proof reader',50000,'TPP','2018-06-15 18:54:32','2018-06-17 18:54:32',0),(1203,'khalillskjds','php dev',30000,'AC','2018-06-17 18:54:32','2019-03-14 09:18:27',1),(1204,'prasanth_xxx','php dev',30000,'AC','2018-06-17 18:54:32','2019-04-07 09:09:24',1),(1205,'kranthixxx','admin',20000,'TP','2018-06-17 18:54:32','2018-12-08 11:50:33',0),(1206,'garry','manager',50000,'TPC','2018-12-10 21:41:09','2018-12-10 21:41:09',1),(1207,'oliver','php dev',2000,'AC','2018-12-15 13:49:13','2018-12-15 13:49:13',1),(1208,'hello','phpDev',200,'TP','2018-12-16 09:41:48','2018-12-16 09:41:48',1),(1209,'ABC','HELLO',300,NULL,'2018-12-16 09:42:04','2018-12-16 09:42:24',1),(1210,'HELLO','HELLO',5800,'TP','2019-01-24 09:02:43','2019-01-24 09:02:43',1),(1211,'WORLD','TEST',8800,'AC','2019-01-24 09:03:15','2019-01-24 09:03:15',1),(1212,'sdfs','sdfsdf',8500,'AC','2019-03-13 22:01:38','2019-03-13 22:01:38',1),(1213,NULL,'sdfsdf',9800,'sdfsdf','2019-03-14 09:08:31','2019-03-14 09:08:54',1),(1214,'xxx','sdfsdf',9500,NULL,'2019-03-14 09:13:32','2019-03-14 09:13:44',0),(1215,'sdfsf','sdfsdfsdf',9870,'TP','2019-04-07 09:10:39','2019-04-07 09:11:18',0),(1216,'hello','HELLO',5600,'AC','2019-04-07 09:37:05','2019-04-07 09:37:05',1),(1217,'HELLO2','hello2',7800,'TP','2019-04-07 09:37:40','2019-04-07 09:38:17',1);
2
3
4
5
6
7
8
9
10
11
12
13
14
15
16
查看数据
# 2)第二步:开发datax的配置文件
node03执行以下命令查看帮助文档
# cd /data/datax
# python bin/datax.py  -r mysqlreader -w streamwriter
2
3
node03执行以下命令开发datax配置文件,根据实际情况填写用户名和密码等。
# cd /data/datax/job
# vim mysql2stream.json
{
    "job": {
        "setting": {
            "speed": {
                 "channel": 3
            },
            "errorLimit": {
                "record": 0,
                "percentage": 0.02
            }
        },
        "content": [
            {
                "reader": {
                    "name": "mysqlreader",
                    "parameter": {
                        "username": "root",
                        "password": "123456",
                        "column": [
                            "id",
                            "name"
                        ],
                        "connection": [
                            {
                                "table": [
                                    "emp"
                                ],
                                "jdbcUrl": [
     "jdbc:mysql://192.168.1.6:3306/userdb"
                                ]
                            }
                        ]
                    }
                },
               "writer": {
                    "name": "streamwriter",
                    "parameter": {
                         "encoding":"GBK",
                        "print":true
                    }
                }
            }
        ]
    }
}
2
3
4
5
6
7
8
9
10
11
12
13
14
15
16
17
18
19
20
21
22
23
24
25
26
27
28
29
30
31
32
33
34
35
36
37
38
39
40
41
42
43
44
45
46
47
# 3)第三步:启动datax实现数据同步
node03执行以下命令实现datax数据同步
# cd /data/datax
# python /data/datax/bin/datax.py  /data/datax/job/mysql2stream.json
报错:
2023-02-27 10:49:31.382 [main] WARN  ConfigParser - 插件[mysqlreader,streamwriter]加载失败,1s后重试... Exception:Code:[Common-00], Describe:[您提供的配置文件存在错误信息,请检查您的作业配置 .] - 配置信息错误,您提供的配置文件[/home/data/datax/plugin/reader/._drdsreader/plugin.json]不存在. 请检查您的配置文件.
2023-02-27 10:49:32.389 [main] ERROR Engine -

经DataX智能分析,该任务最可能的错误原因是:
com.alibaba.datax.common.exception.DataXException: Code:[Common-00], Describe:[您提供的配置文件存在错误信息,请检查您的作业配置 .] - 配置信息错误,您提供的配置文件[/home/data/datax/plugin/reader/._drdsreader/plugin.json]不存在. 请检查您的配置文件.
        at com.alibaba.datax.common.exception.DataXException.asDataXException(DataXException.java:26)
        at com.alibaba.datax.common.util.Configuration.from(Configuration.java:95)
        at com.alibaba.datax.core.util.ConfigParser.parseOnePluginConfig(ConfigParser.java:153)
        at com.alibaba.datax.core.util.ConfigParser.parsePluginConfig(ConfigParser.java:125)
        at com.alibaba.datax.core.util.ConfigParser.parse(ConfigParser.java:63)
        at com.alibaba.datax.core.Engine.entry(Engine.java:137)
        at com.alibaba.datax.core.Engine.main(Engine.java:204)
2
3
4
5
6
7
8
9
10
11
12
13
14
15
部署datax到本地后首次执行任务报错
分别进入到 reader和 writer 目录,删除掉这类型文件
cd /data/datax/plugin/reader
rm -rf  ./._*

cd /data/datax/plugin/writer
rm -rf  ./._*
2
3
4
5
再次执行
# python /data/datax/bin/datax.py /data/datax/job/mysql2stream.json

# 案例三:使用datax实现增量数据同步
使用datax实现增量数据同步打印到控制台
# 1)第一步:开发datax的配置文件
node03执行以下命令开发datax配置文件
# cd /data/datax/job
# vim mysql2streamadd.json
{
    "job": {
        "setting": {
            "speed": {
                 "channel": 3
            },
            "errorLimit": {
                "record": 0,
                "percentage": 0.02
            }
        },
        "content": [
            {
                "reader": {
                    "name": "mysqlreader",
                    "parameter": {
                        "username": "root",
                        "password": "123456",
                        "column": [
                            "id",
                            "name"
                        ],
						"where": "create_time > '${start_time}' and create_time < '${end_time}'",
                        "connection": [
                            {
                                "table": [
                                    "emp"
                                ],
                                "jdbcUrl": [
									"jdbc:mysql://192.168.1.6:3306/userdb"
                                ]
                            }
                        ]
                    }
                },
               "writer": {
                    "name": "streamwriter",
                    "parameter": {
                         "encoding":"GBK",
                        "print":true
                    }
                }
            }
        ]
    }
}
2
3
4
5
6
7
8
9
10
11
12
13
14
15
16
17
18
19
20
21
22
23
24
25
26
27
28
29
30
31
32
33
34
35
36
37
38
39
40
41
42
43
44
45
46
47
48
# 2)第二步:启动datax实现数据同步
# cd /data/datax
# /data/datax/bin/datax.py /data/datax/job/mysql2streamadd.json -p "-Dstart_time='2018-06-15 00:00:00' -Dend_time='2023-06-15 23:59:59'"

SQL:
select id,name from emp where (create_time > '2018-06-15 00:00:00' and create_time < '2023-06-15 23:59:59'
2
3
4
5
# 案例四:使用datax实现mysql2mysql
使用datax实现将数据从mysql当中读取,并且通过sql语句实现数据的过滤,并且将数据写入到mysql另外一张表当中去
# 1)第一步:创建mysql另外一张表
# mysql -u root -h 192.168.1.6 -P 3306 -p

mysql> USE userdb;
mysql> CREATE TABLE `emp2` (
  `id` INT(11) DEFAULT NULL,
  `name` VARCHAR(100) DEFAULT NULL,
  `deg` VARCHAR(100) DEFAULT NULL,
  `salary` INT(11) DEFAULT NULL
) ENGINE=INNODB DEFAULT CHARSET=latin1;
2
3
4
5
6
7
8
9
# 2)第二步:开发datax的配置文件
查看帮助文档
# cd /data/datax
# python /data/datax/bin/datax.py  -r mysqlreader -w mysqlwriter
2
node03执行以下命令开发datax配置文件
# cd /data/datax/job/
# vim mysql2mysql.json
{
    "job": {
        "setting": {
            "speed": {
                 "channel":1
            }
        },
        "content": [
            {
                "reader": {
                    "name": "mysqlreader",
                    "parameter": {
                        "username": "root",
                        "password": "123456",
                        "connection": [
                            {
                                "querySql": [
                                    "select id,name,deg,salary from emp where id < 1208;"
                                ],
                                "jdbcUrl": [
                                    "jdbc:mysql://192.168.1.6:3306/userdb"
                                ]
                            }
                        ]
                    }
                },
                  "writer": {
                    "name": "mysqlwriter",
                    "parameter": {
                        "writeMode": "insert",
                        "username": "root",
                        "password": "123456",
                        "column": [
                            "id",
                            "name",
							"deg",
							"salary"
                        ],
                        "session": [
                        	"set session sql_mode='ANSI'"
                        ],
                        "preSql": [
                            "delete from emp2"
                        ],
                        "connection": [
                            {
                                "jdbcUrl": "jdbc:mysql://192.168.1.6:3306/userdb?useUnicode=true&characterEncoding=utf-8",
                                "table": [
                                    "emp2"
                                ]
                            }
                        ]
                    }
                }
            }
        ]
    }
}
2
3
4
5
6
7
8
9
10
11
12
13
14
15
16
17
18
19
20
21
22
23
24
25
26
27
28
29
30
31
32
33
34
35
36
37
38
39
40
41
42
43
44
45
46
47
48
49
50
51
52
53
54
55
56
57
58
59
60
# 3)第三步:启动datax实现数据同步
node03执行以下命令实现datax数据同步
cd /data/datax
python /data/datax/bin/datax.py /data/datax/job/mysql2mysql.json
2
完成
2023-02-27 15:57:43.684 [job-0] INFO  JobContainer - PerfTrace not enable!
2023-02-27 15:57:43.685 [job-0] INFO  StandAloneJobContainerCommunicator - Total 7 records, 177 bytes | Speed 17B/s, 0 records/s | Error 0 records, 0 bytes |  All Task WaitWriterTime 0.000s |  All Task WaitReaderTime 0.000s | Percentage 100.00%
2023-02-27 15:57:43.687 [job-0] INFO  JobContainer -
任务启动时刻                    : 2023-02-27 15:57:33
任务结束时刻                    : 2023-02-27 15:57:43
任务总计耗时                    :                 10s
任务平均流量                    :               17B/s
记录写入速度                    :              0rec/s
读出记录总数                    :                   7
读写失败总数                    :                   0
2
3
4
5
6
7
8
9
10
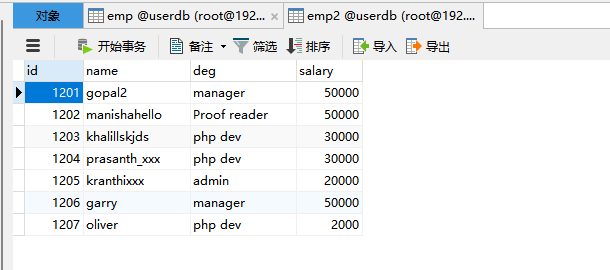
# 4)查看数据
# 帮助文档
MysqlReader 插件文档: https://github.com/alibaba/DataX/blob/master/mysqlreader/doc/mysqlreader.md
DataX MysqlWriter https://github.com/alibaba/DataX/blob/master/mysqlwriter/doc/mysqlwriter.md
# python /data/datax/bin/datax.py -r mysqlreader -w mysqlwriter
{
    "job": {
        "content": [
            {
                "reader": {
                    "name": "mysqlreader",							# 读取端
                    "parameter": {
                        "column": [], 								# 需要同步的列 (* 表示所有的列)
                        "connection": [
                            {
                                "jdbcUrl": [], 						# 连接信息
                                "table": []							# 连接表
                            }
                        ],
                        "password": "", 							# 连接用户
                        "username": "", 							# 连接密码
                        "where": ""									# 描述筛选条件
                    }
                },
                "writer": {
                    "name": "mysqlwriter",							# 写入端
                    "parameter": {
                        "column": [], 								# 需要同步的列
                        "connection": [
                            {
                                "jdbcUrl": "", 						# 连接信息
                                "table": []							# 连接表
                            }
                        ],
                        "password": "", 							# 连接密码
                        "preSql": [], 								# 同步前. 要做的事
                        "session": [],
                        "username": "",								# 连接用户
                        "writeMode": ""								# 操作类型
                    }
                }
            }
        ],
        "setting": {
            "speed": {
                "channel": ""										# 指定并发数
            }
        }
    }
}
2
3
4
5
6
7
8
9
10
11
12
13
14
15
16
17
18
19
20
21
22
23
24
25
26
27
28
29
30
31
32
33
34
35
36
37
38
39
40
41
42
43
44
45
46