# 开源项目MessageNest打造个性化消息推送平台多种通知方式
今天介绍一个开源项目,Message Nest - 可以打造个性化消息推送平台,整合邮件、钉钉、企业微信等多种通知方式。定制你的消息,让通知方式更灵活多样。
开源地址: https://github.com/engigu/Message-Push-Nest
# 测试平台
系统: centos7
IP: 192.168.1.15
1
2
2

# 安装MessageNest
[root@node15]# mkdir /data/MessageNest/
# cd /data/MessageNest/
[root@node15 MessageNest]# wget https://github.com/engigu/Message-Push-Nest/releases/download/v0.1.0/Message-Nest_Linux_x86_64.tar.gz
[root@node15 MessageNest]# tar -zxvf Message-Nest_Linux_x86_64.tar.gz

[root@node15 MessageNest]# ll
total 20652
drwxr-xr-x 2 root root         21 Jan 26 15:33 conf
-rw-r--r-- 1 1001 docker     1116 Jan 26 15:20 LICENSE
-rw-r--r-- 1 root root    5914641 Jan 26 15:30 Message-Nest_Linux_x86_64.tar.gz
-rwxr-xr-x 1 1001 docker 15216640 Jan 26 15:21 Message-Push-Nest
-rw-r--r-- 1 1001 docker     4692 Jan 26 15:20 README.md

# mv conf/app.example.ini conf/app.ini
1
2
3
4
5
6
7
8
9
10
11
12
13
14
2
3
4
5
6
7
8
9
10
11
12
13
14
# 数据库配置:
我本地已经有安装mysql,如果没有还需要安装,安装教程自行度娘。
数据库地址: 192.168.1.8:61922
用户: message-user
密码: 123456
库名: messagenest
1
2
3
4
2
3
4
# 修改配置
vim conf/app.ini

[app]
JwtSecret = message-nest
RuntimeRootPath = runtime/
LogLevel = INFO

; init table data, first run set enable
InitData = enable

[server]
; debug or release
RunMode = release
HttpPort = 8000
ReadTimeout = 60
WriteTimeout = 60
; use embed html static file
; EmbedHtml = disable

[database]
Type = mysql
User = message-user
Password = 123456
Host = 192.168.1.8
Name = messagenest
Port = 61922
TablePrefix = message_
; SqlDebug = enable
1
2
3
4
5
6
7
8
9
10
11
12
13
14
15
16
17
18
19
20
21
22
23
24
25
26
27
28
2
3
4
5
6
7
8
9
10
11
12
13
14
15
16
17
18
19
20
21
22
23
24
25
26
27
28
# 启动Message-Nest
直接运行软件,会输出信息

# ./Message-Push-Nest
2024/01/26 15:46:00 [info] replacing callback `gorm:update_time_stamp` from /home/runner/work/Message-Push-Nest/Message-Push-
.....
[2024-01-26 15:46:00.495]  INFO [main.go:50 main] [PID:504]: start message server @ http://0.0.0.0:8000

后台运行:
nohup ./Message-Push-Nest  >/dev/null 2> Message-Push-Nest.log &
查看日志:
tail -f Message-Push-Nest.log
1
2
3
4
5
6
7
8
9
10
11
2
3
4
5
6
7
8
9
10
11
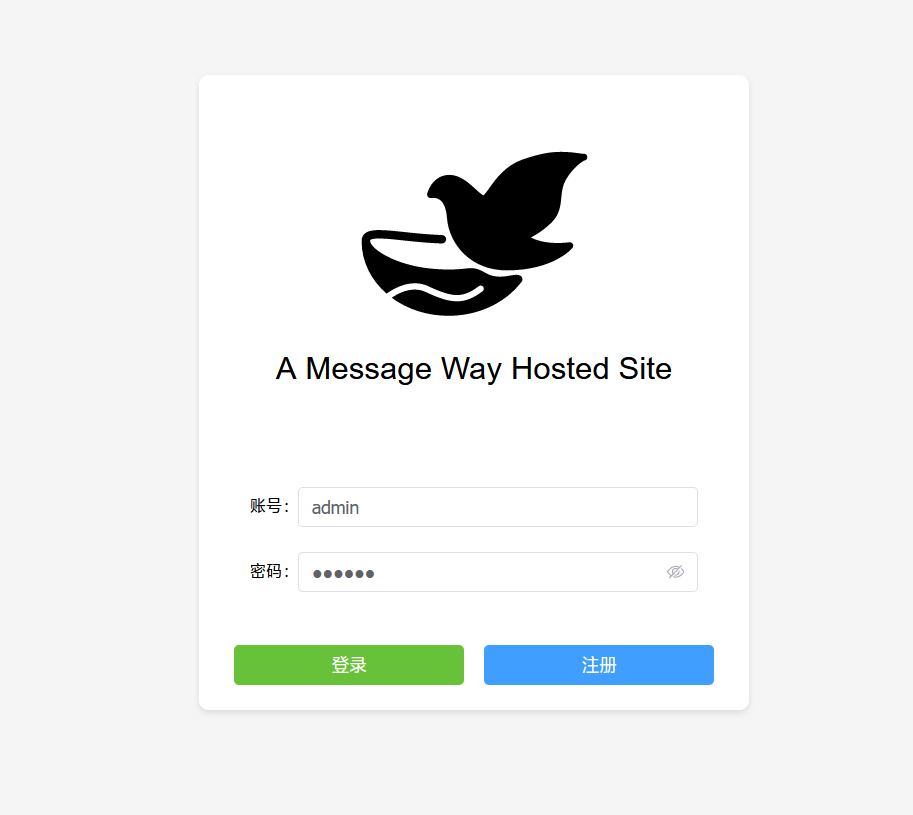
# 进入后台
浏览器输入 http://192.168.1.15:8000
默认用户名: admin
密码: 123456
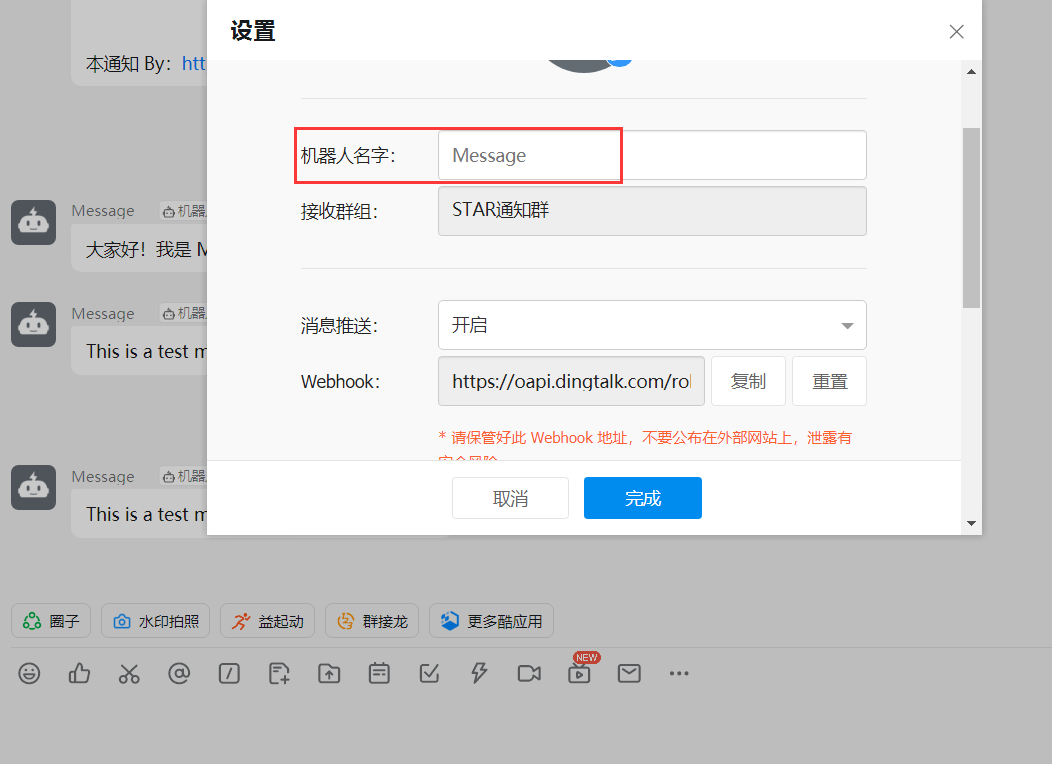
# 钉钉群新建机器人
记住: Webhook 和 加签
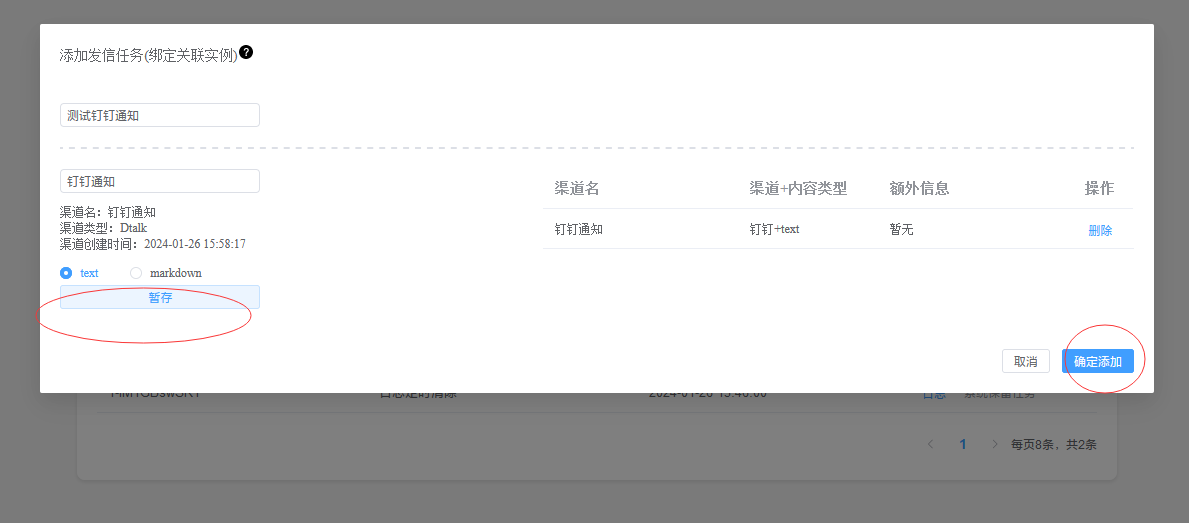
# 添加钉钉渠道
再进入Message-Nest后台添加发信渠道
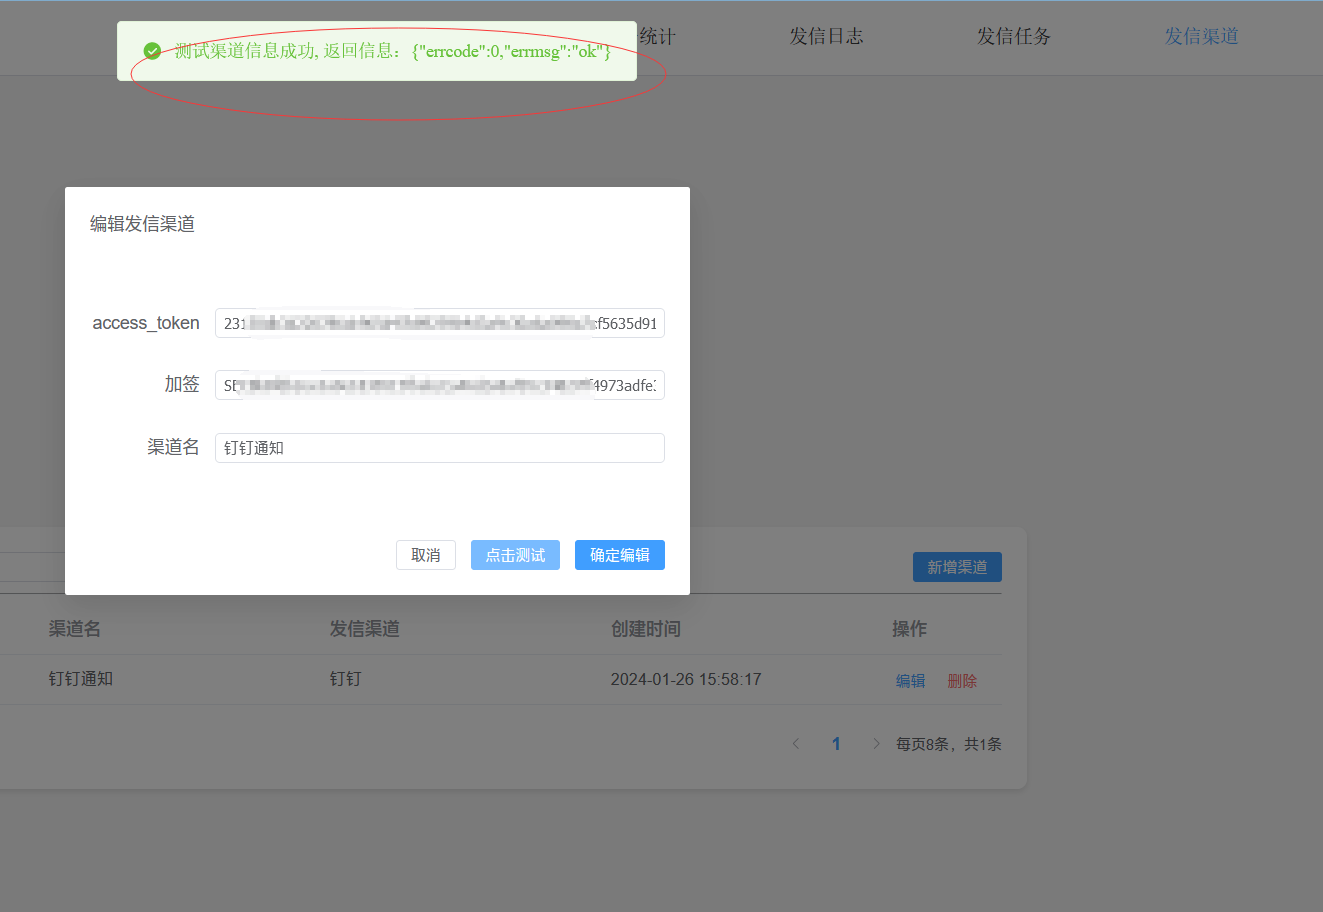
测试成功

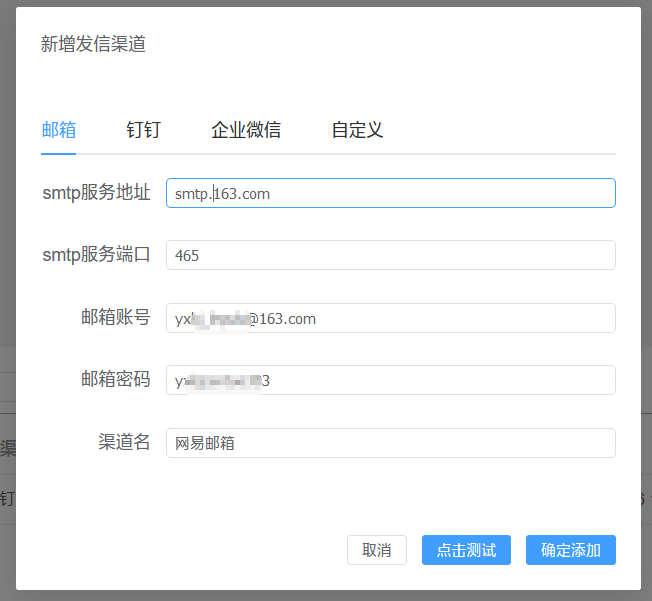
# 添加邮箱渠道
注意邮箱密码是登录密码,不要泄露了。
而且需要开通IMAP/SMTP服务。
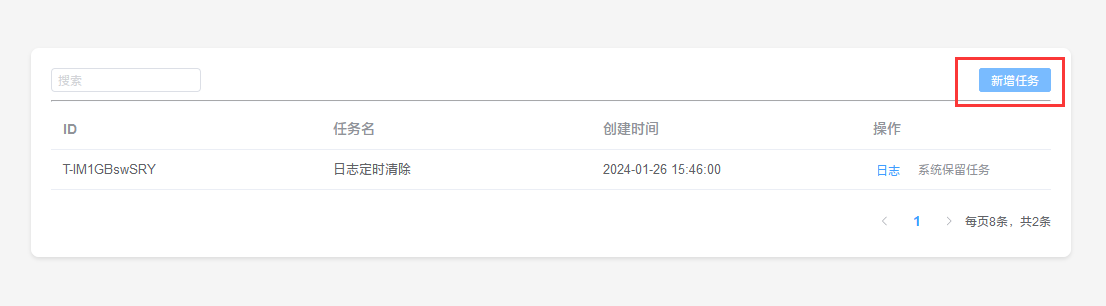
# 发信任务
新增任务
点击 暂存,确定添加
# 测试发送
点击 接口

一个任务可能关联多个不同渠道的实例 实例的内容类型大体上可以可以分为text、html、markdown 发送的消息会优先选择相应的类型消息进行发送,如果没有,将使用传的text消息进行发送 ** text节点必传,指定mode=sync将同步发送,默认异步发送
# curl -X POST --location 'http://192.168.1.15:8000/api/v1/message/send' \
--header 'Content-Type: application/json' \
--data '{
"task_id": "T-yejHQOGXo9",
"title": "message title",
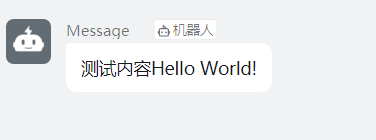
"text": "测试内容Hello World!"
}'
用linux服务器执行这个命令
1
2
3
4
5
6
7
8
9
2
3
4
5
6
7
8
9

# 钉钉上收到通知
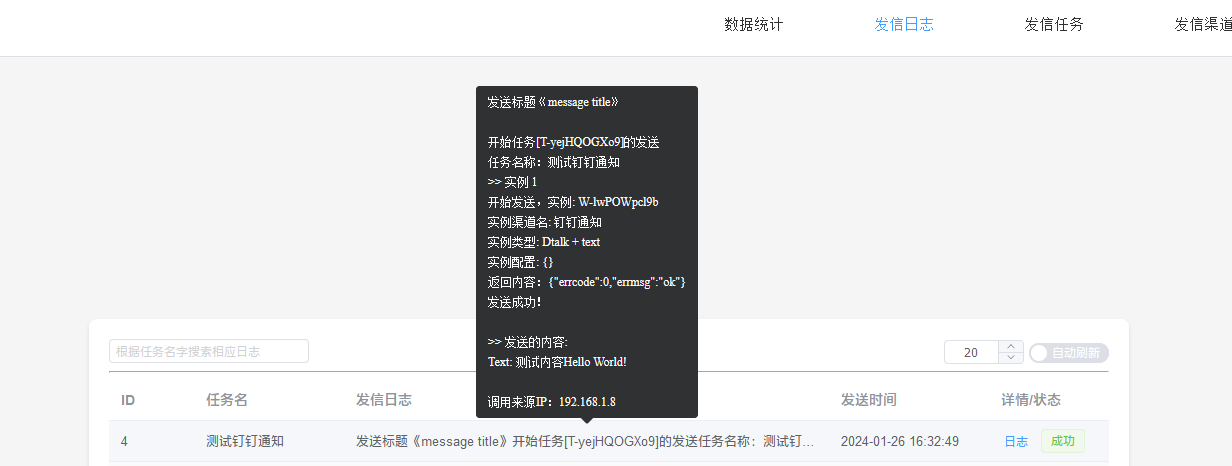
# 发信日志界面
有刚才的发送记录
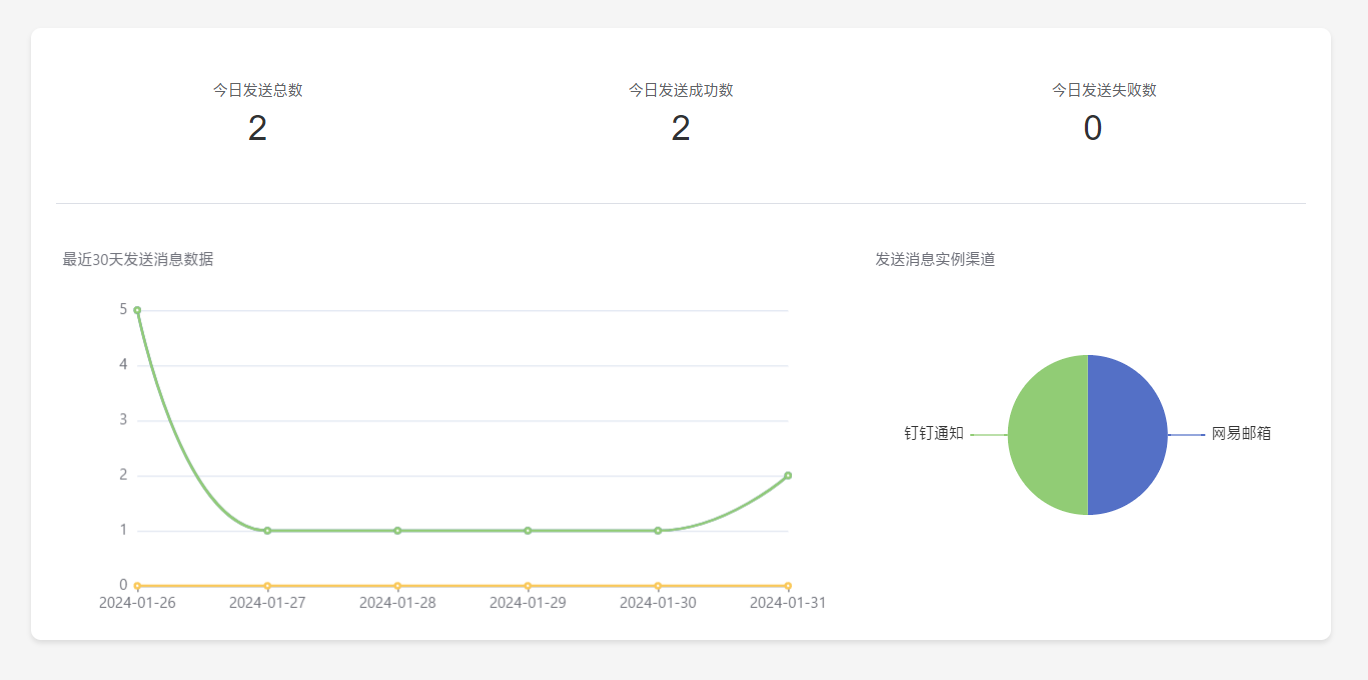
# 数据统计界面